
Winter holiday recipe: Make these easy hot chocolate bombs
It’s that time of year again. The holidays are in full swing. The temps are dropping, the tree is up, the house is decorated, and Christmas movies are on the TV. The perfect remedy for the winter blues is a hot cocoa bomb.
Hot cocoa bombs are all the rage this year. Instagram, TikTok, Facebook, YouTube, you can't get away from seeing someone share a video of someone enjoying their hot chocolate in a brand new way. Seriously. They’re everywhere. Currently, there are more than 300 million views of the hashtag #hotchocolatebombs on TikTok.
Just look at these incredible creations on TikTok.
@sheri_wilson_Minnie Mouse Hot Cocoa Bomb 🐭 #hotcocoabomb #hotchocolate #cocoabombs #disney #disneyfood @Disney♬ Mickey Mouse Clubhouse Theme Song (From "Mickey Mouse Clubhouse") - Geek Music
How cool is that?
@cakemehometonight
Cookies and cream hot chocolate bombs! #cookiesandcream #oreo #oreoforsanta #oreos #hotchocolate #hotchocolatebomb
♬ You Spin Me Round (Instrumental Version) - Hillberg & D-Tex
Now, you could always go out to the store and buy them, but let's be real. Where's the fun in that? This past weekend, my girlfriend and I decided we wanted to get our hands dirty (and chocolatey) and give our own recipe a shot. Not only was it delicious, but it was a lot of fun, and super easy, too.
Before we get started, here are some items you may not have lying around your house that you'll need:
Silicone half-ball sphere molds.
We used Mike & Jen's Hot Chocolate Mix, but you can use any mix you'd like.
New Jersey 101.5 collects revenue from purchases made with the affiliate links included in this post.
Now that you have what you need to make these little chocolatey balls of deliciousness, let's dive in.

INGREDIENTS
You’ll need to get fresh chocolate chips. The better the quality, the better the bomb. If you have chocolate chips laying around from another baking project, it’s best to NOT use them. They won’t melt properly for what you’ll need here.
We got two 11 oz bags of Ghirardelli chocolate chips to make the bombs. We also picked up an 11 oz bag of white chocolate chips, also from Ghirardelli, to drizzle over the top of the bomb, but that’s optional.
For the molds, we got a pair of silicon half-ball sphere molds from Amazon.
In addition to the mini marshmallows, we also got Mike & Jen’s hot chocolate mix to put inside our bombs.
The final thing you’ll need is food-grade paintbrushes. You’ll use these to coat the molds and seal up the bombs.

Step 1
Empty one 11 oz bag of chocolate chips in a microwave-safe bowl.

Step 2
Microwave the chocolate chips in 15-second increments. Make sure to stir them in between sessions. Don’t over-cook the chocolate. If it starts to look like brownie batter, you’ve burnt the chocolate and will have to start over. It took us about 2 and a half sessions of 15 seconds to get the consistency we needed.

Step 3
Once the chips are mostly melted, mix by hand until all the chips have melted. If you have a candy thermometer, the ideal temperature for the chocolate is between 88 and 90 degrees.

Step 4
Spoon about a tablespoon (possibly more depending on the size of your mold) of the melted chocolate into each mold. Use the food-safe paintbrushes to coat the entirety of the mold. Be sure to cover all of the mold, or you’ll have some holes in your bomb.

Step 5
Once the molds are painted with chocolate, place them in the refrigerator for 10 minutes.

Step 6
While waiting for the molds to chill, go back and repeat steps one through three. You can use any excess chocolate already in your first bowl.

Step 7
After the 10 minute cooldown, grab your molds from the refrigerator. Scoop another tablespoon of melted chocolatey goodness and paint another layer of chocolate. Again, be sure to paint over any spots you may have missed! You’ll have leftover melted chocolate. Put that aside because you’ll need it for later.

Step 8
Once the molds have been properly coated, place them in your freezer for five minutes, or until solid.

Step 9
While the molds are in the freezer, let’s grab the ingredients to fill our bombs. Here, I have mini marshmallows and hot chocolate mix. For some of the bombs, I took some crushed up Oreos and placed them inside the bombs. This is the best part for you to be creative with! You could try any combination. I’ve seen people use sprinkles (or jimmies), crushed peanut butter cups, cookies, and a whole lot more.

Step 10
Once the molds are finished chilling, gently pop out the chocolate. Be very careful not to crush the chocolate.

Step 11
Heat up the excess chocolate from before. Again, heat it in your microwave in 15-second increments. Be sure to not burn your chocolate. This will be the glue to hold each half of the molds together.

Step 12
Time to get filling! Fill half of the shells with whatever ingredients you’d like. Here, we used about half of a hot chocolate mix pouch, a few marshmallows, and a crushed Oreo.

Step 13
Take one of the empty shells and dip the rim into the melted chocolate. Then, place it on top of the filled shell.

Step 14
Dip your food-safe paintbrush into the melted chocolate and paint along the seam. This will make sure your hot chocolate bomb doesn’t fall apart until you’re ready for it to melt.

Step 15
Once finished you can use an empty muffin tin to hold your bombs until you’re ready to store them (or enjoy them!). Pop them into your refrigerator for a few minutes to make sure your chocolate “glue” is set.

Step 16 (Optional)
For our hot chocolate bombs, we drizzled some melted white chocolate on top. If you don’t want to do this, skip ahead to step 18. Take about one cup of white chocolate chips and place them into a microwave-safe bowl. You can microwave these chocolate chips the same way you did earlier – in 15-second increments - until mostly melted. Hand mix once mostly melted.

Step 17 (Optional)
Once ready, using a spoon, drizzle the white chocolate over the hot chocolate bombs.
Step 18
For storage, keep your bombs in an air-tight container if you don’t plan on having them right away. You can keep them in the fridge until you’re ready to enjoy them.
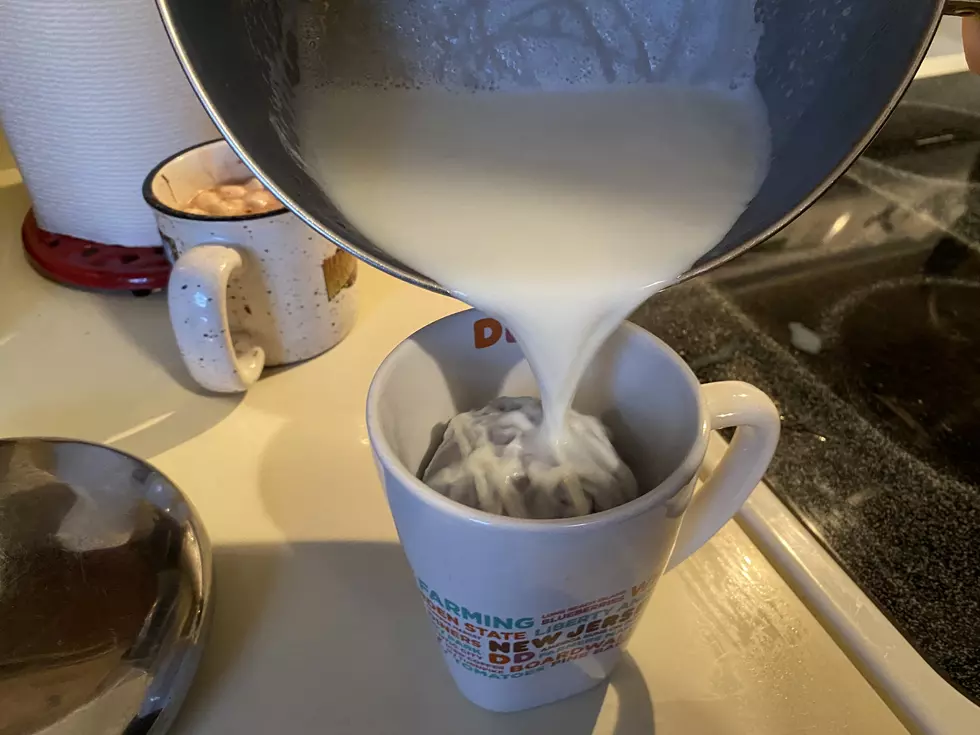
Step 19
Time to dive in! Place the bomb into a large mug. Heat up some milk and pour it over your hot chocolate bomb. Once your bomb has fully melted, make sure to give it a stir.

Step 20
The most important step of all. ENJOY!!!
The most popular Christmas decorations in the US
Gallery Credit: Bill Doyle
NJ’s most hated Christmas decorations
Gallery Credit: Jeff Deminski
More From 94.3 The Point


